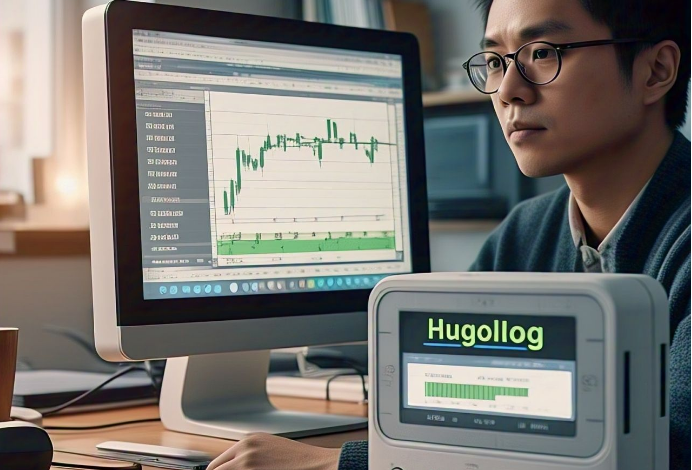
Introduction to How to Link Hugolog with IPC Terminal
Once you have complete control on how to link Hugolog with IPC Terminal, this can assist in the achievement of a seamless smart home and security management experience. You can manage locks, cameras, and other devices from the same platform. This results in centralized operations which invariably improves the security management of the property.
Whether you want to get these powerful devices integration to strengthen a weakness in your home security system or simply you are an tech savvy, this is a must understand connection on how to control both of these command and control interfaces. Both IPC Terminal and Hugolog are designed with the user interface feature that is friendly so it will not be a challenge to anyone who is willing to follow the simple procedures. Now, if you are prepared for an unprecedented level of control over your home’s security, get ready to explore the benefits and follow the step-by-step connections to make this possible.
Table of Contents
Benefits of Linking Hugolog with IPC Terminal
There are many advantages of Linking Hugolog with IPC Terminal. For example, monitoring and managing spaces in real time enhances the security and peace of mind.
Now it will be possible to enable and disable locking systems remotely, thanks to this technology integration. This eliminates the hassle of digging out keys from bags and pockets when both hands are already occupied- now it only takes a quick tap on the device.
In addition, Hugolog and the IPC Terminal work well together in the notification department. You can get alerts sent straight to your smartphone, letting you know when there are activities taking place in the home or office that require immediate attention.
And that is not it, the process of installation is also user friendly. Even the most technologically inept individuals can manage linking these systems.
Together, they expand the system integrating one smart environment that adjusts to your needs. With system integration, users can enjoy increased functionality as everyday chores can be accomplished in a far more effective manner.
Step 1: Setting up the Hugolog Software
To use the IPC Terminal to set up a Hugolog, Hubolog software must first be installed. Start by acquiring the most up to date version from the entity’s official site. Ensure that the operating system being used is compatible for easy installation.
The next step is to open the downloaded file and employ the provided installation wizard guidance. As the setup should take a couple of minutes, ensure that all permissions being requested are granted to enable use of all functions.
Post completion of the download and installation, launch the app and sign up right away if it is a compulsory step. Make sure that the information you fill out is correct in all aspects.
The next step is to get accustomed with the app’s user interface. This helps in setting up element configurations with ease as you try to integrate Hugolog with your IPC Terminal. A small amount of tinkering comes handy during configuration processes afterward.
Step 2: Configuring IPC Terminal
Modifying an IPC terminal is quite simplistic. Start by switching on the device and later going straight into the settings section of the device. In this area, there are options that enable modification for certain functions.
Now, make sure that your terminal is on the same network as the Hugolog. This is an important step for smooth linking of the devices. Scan the settings for WiFi and put in your network details.
When the connection has been made, set up any necessary security features. You may consider enabling encryption or putting in user permissions, all depending on who will be using the system.
Be careful to apply all the changes made before quitting the configuration stage. Smooth performance comes easy with Hugolog when there is proper setup at this stage.
Step 3: Connecting Hugolog and IPC Terminal
The next logical step is to connect both systems for real time data stream immersion once it is certain that the Hugolog and IPC Terminal have been installed. This can first be achieved by opening the Hugolog app on your preferred device. Ensure that you enter the appropriate credentials to complete the login process.
Once logged in, proceed to locate the connection setting within the app. In this section, you will view the option, “Connect to IPC Terminal,” which must be selected in order to create a link connection required.
A prompt may pop up asking for the unique code that is shown on the screen of your IPC Terminal. Type the code into the hugging app to connect both systems together and facilitate succinct communication.
Upon the connection being initialized, keep an eye out for any notifications confirming the pairing. When done correctly, data flow between both systems will begin, allowing for firsthand interaction with security management systems in real time.
If any problems arise during these steps, simply verify network connections are enabled and the devices have the latest software available before the process is attempted again.
How to connect hugolog?
Turn on your device and check if it is connected to the WiFi network before powering on the Hugolog.
To connect the new device, kindly follow the instructions provided. The application will assist you in the process of connecting to your WiFi. You will be required to type in your password when asked.
The next step is to bring your mobile device in close proximity to the Hugolog in order to receive pairing notifications. The app will alert you once the device is successfully connected.
Now that your device is connected, use the various available settings to adjust how you would like to receive notifications as well as the access permissions they require.
How to connect hugolog camera to WiFi?
In order to have the camera function properly, you need to ensure that it is connected to WiFi. Begin by turning the camera on and making sure that it is in the range of your WiFi network.
The next step is to open the Hugolog app installed on your phone or tablet. Go to the settings option and click on the connect devices button. On the next screen click “WiFi Setup” to move on to the next step.
Your app will direct you to select a WiFi network from a given a list. Make sure to type in your password accurately, as this is the most important step for connecting.
Your camera will show the success signal by changing a light indicator or notify you through the app once the device is paired. Try to see if the connection works by checking the live stream directly in the application.
In the event something goes wrong during the set up, check if your credentials are accurate and see if you have an issue with the internet connection’s router.
How to lock a hugolog?
Locking a hugolog is a simple and user-friendly feature. Start by verifying that your device is switched on and connected to your network.
Busyness renders many decisions difficult. To begin lock activation, open the application of your hugolog. Locate the lock icon or any other icon with a similar context within the interface. Press it and heed any instructions displayed on your monitor.
Biometric options like fingerprints or facial recognition can be integrated to make the process easier. Just make sure you are identifying yourself when you are supposed to.
You’ll get a notification indication that it’s secure after successful locking. Consider checking it once it is set every so on to see if everything is functional to enhance security.
How can I set my lock?
Setting up the lock on your hugolog device is an easy process as you would expect it to be. First, you will need to search for the set-up switch on your device. This is normally located around the battery area.
You can start by pressing and holding the button on the controller until you hear a double beep or see a light indicator flashing. This will indicate that the lock is ready to be programmed.
The next step is to type to the lock using the keypad the predetermined passcode that you would like to use. Remember that the passcode should be easy to remember, but hard to guess. Finally, press the confirmation key to save the code.
It is also important to note that some advanced models can connect via mobile applications in order to provide remote changes on the settings. Always check the user’s manual for directions that are unique for your model.
After setting the lock, it is wise to test the lock a couple of times to examine if the functionality is as intended. Try using the locking and unlocking modes to ensure that everything works properly and there are no problems.
Which key Cannot open a lock?
Every lock is constructed with a particular key for it. This indicates that some keys will be utterly useless when trying to open certain locks.
For example, the standard house key cannot open a car or a padlock. There are specific grooves and pins associated with each lock that will only match a particular key.
On the other hand, master keys can unlock a variety of locks. However, there are many locks that are outside their system that the master key won’t work on.
A damaged key can also constitute a difficulty, and it is even probable that it will not work in the lock at all. There are indeed some locks that do not employ keys and include, for example, locks that are opened with fingerprints, which are said to be biometric locks.
Essentially, the different shape used by various keys and locks is a guarantee of security and functionality their combination has to offer.
Troubleshooting Common Issues
The linkage of Hugolog with IPC Terminal is sometimes accompanied by some issues. First, there are the connection problems. Make sure that both devices are connected to the same network. Some simple resets may fix basic issues.
If there are issues with the video streaming, check the security firewall. There are occasions when the protection hardware application software may prevent connections between the two.
Another problem that IT users often face is the settings that are wrongly done. Make sure that every setting of the two systems, Hugolog and the IPC Terminal are correct, and they are set the same. A simple typo is sufficient to purpose mistakes.
In case there are lags or delays of the footage being streamed, try changing the software’s resolution settings. Reducing it will improve the performance while maintaining fair video quality.
In case there is a failure to receive the anticipated notifications, check again the permissions in the app and the notification settings in the smart device for any checks that might be preventing the communication.
Conclusion
The integration of Hugolog and IPC Terminal may be achieved quite easily and yet it leads to the improvement of the effectiveness of your entire security setup. This guide makes it simple to set up the installation and configuration steps of both systems. There is no question as to the benefits that are achieved, irrespective of whether the goal is improved connectivity or improved functionality.
As with all software and hardware combinations, make sure you always look for updates to enable smooth integration. If there are any problems, make sure you go back to the troubleshooting section of the guide. Now you have a reason to breathe easy knowing that your security needs are effectively taken care of by one cohesive solution!
 Login Vidude: Easy Access to Your Favorite Videos
  Cheryl Melanie Louie New York: A Closer Look at Her Journey
  Hygropack: Innovative Solutions for Moisture Control
  PPSSPP Pico Wiring HyperHDR Setup Guide for Gamers and Tech Enthusiasts
  ETS2 Iranian Lowbed Mod: Best Features and How to Install
  Dave Watkin Aggreg8: Revolutionizing Aggregation Services